Featured Slider

Chocolate GF ONOs

Who else LOVES an abbreviation? GF (Gluten free) ONOs (Overnight Oats) See what I did there?! 

So you could say, BRB GTG and make some GF ONOs after you've read this post ;) Oh wow, cheesy Nicola, very cheesy.


WHAT YOU NEED -
There is only 2 (maybe 3) super simple steps to this recipe and it only takes at MAX 15 minutes to prepare - 

  1. Throw all the ingredients into and bowl and mix them until it's a big chocolatey gooey mess
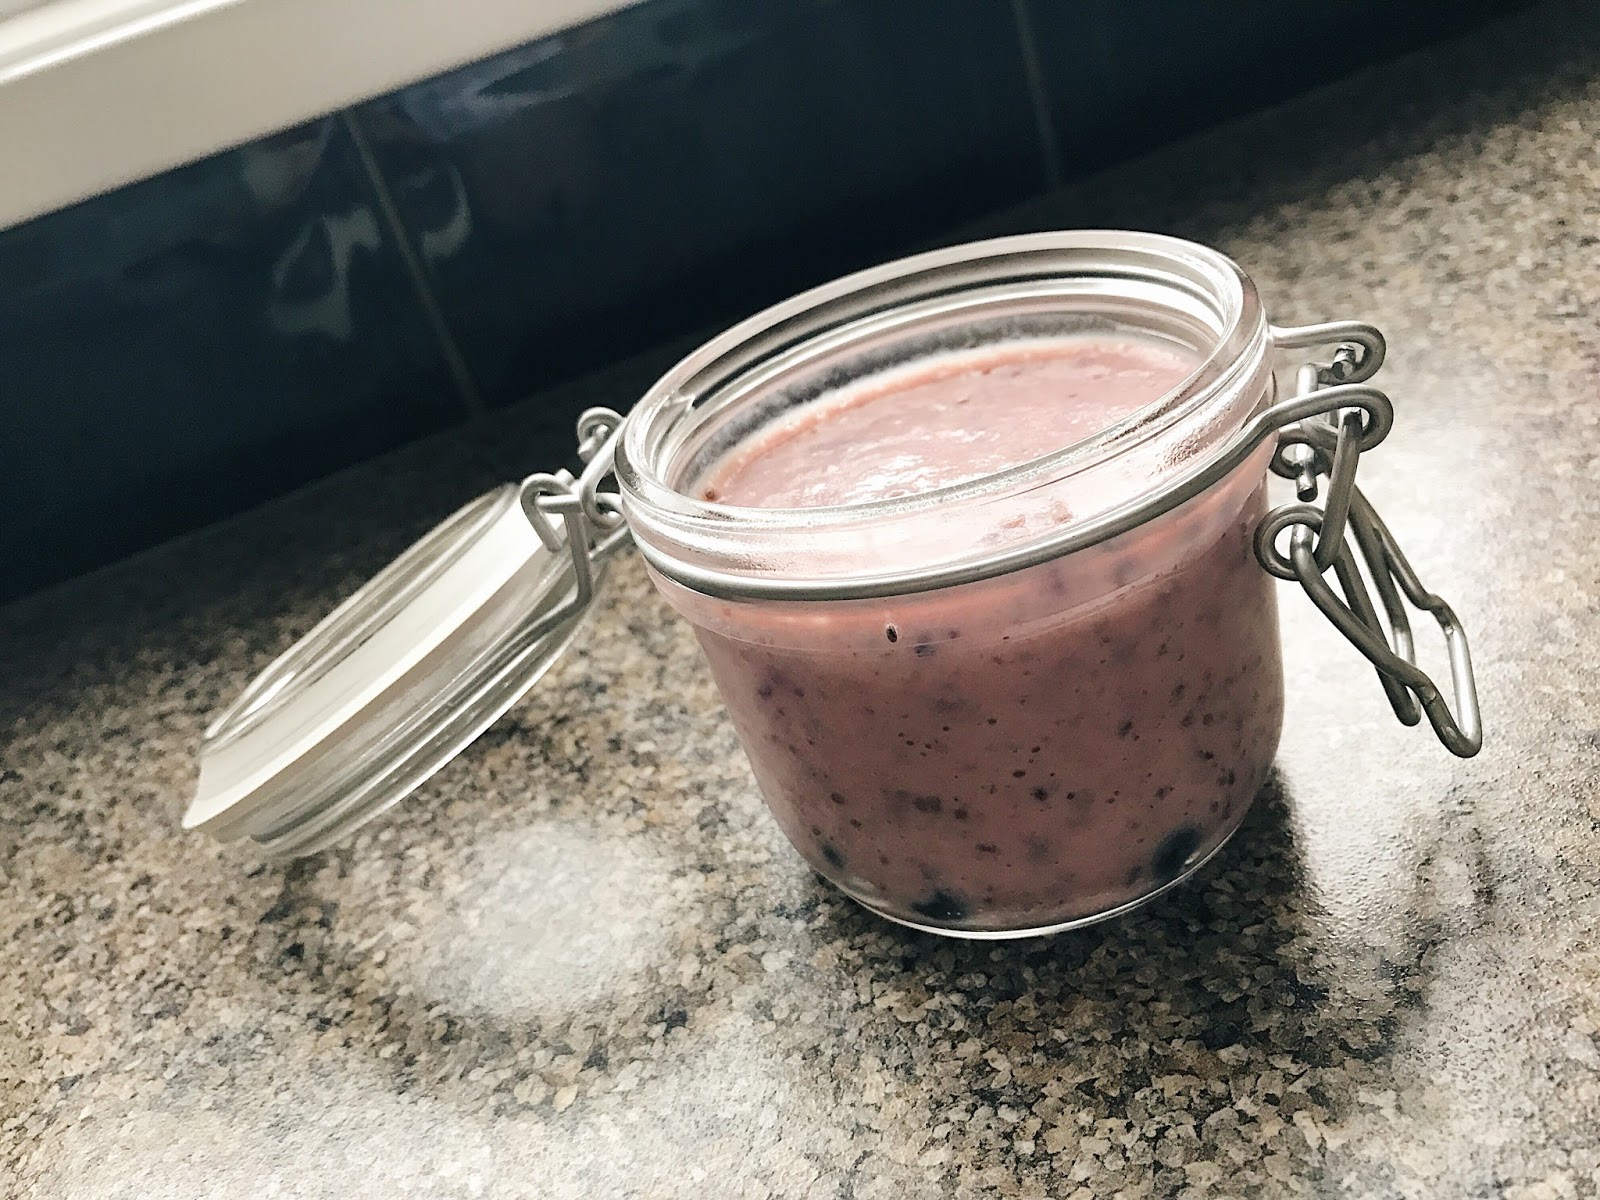
  2. Split the mixture between a couple of jars, I think mine are from Wilko, but you can get them from literally anywhere that does kitchen/home stuff. 
  3. Place it in the fridge overnight and there, DONE! 
Then the next day you do not have to worry about making breakfast at all, you can have an extra 15 minutes in bed or standing in the warm shower contemplating work.. (we all do it, don't deny it)


Please please please let me know whether you try this recipe and what you think in the comments, I would really appreciate it! 

Ciao for now xo


Healthy(ish) Gluten Free Chocolate Chip Cookies

Sometimes, finding things that don't bloat you (I find wheat bloats me, hence the gluten free), satisfy your hunger and sweet cravings is hard... Very hard. We aalll know it girls,

So I was in the kitchen today and I was starving, wasn't quite lunch time, but way past breakfast time. I wanted biscuits, no not wanted, NEEDED biscuits. But I am trying to be good lately, so I thought I'd make my own!


To make these gorgeous chocolaty oaty biscuits you will need -

  • 3 tablespoons of butter
  • 1/2 a cup of brown sugar
  • 1/4 cup of honey
  • 1 egg
  • 1 tablespoon of water
  • 1/2 a cup of gluten free flour (or normal if you're not GF)
  • 1/2 a teaspoon of salt
  • 1/4 of baking soda
  • 1 1/2 cups of rolled oats. (I used Quakers Gluten Free oats)
  • 2 teaspoons of caocoa powder
  • Hand full of dark chocolate chips
  • 1/2 a teaspoon of vanilla essence

There is a method to this madness, trust me -

  1. Preheat your oven to 180 degrees (my oven is fan assisted) and prepare your baking tray with grease proof paper.
  2. Mix together the butter and sugar, then add the egg honey and water, mix until thoroughly combined
  3. Sift the dry ingredients together, then add them to the wet ingredients. Not going to lie, this will hurt your arms when you're mixing but you can power through it!
  4. Add the chocolate chips (the yummiest part)
  5. Get a teaspoon, pile on the mixture so you get a very heaped teaspoon full and drop it on the baking tray, keeping going until your mixture is used up.
  6. Bake in the oven for 12-15 minutes, then cool on a wire rack.

That's it! SO easy to make and soooooooooo tasty too!

Comment below if you try the recipe and let me know what you think!

Ciao for now xo

Chia Seed Puddings

First of all, I want to apologise for being so absent from writing post's! Lets just say, life got in the way a bit. But I'm back now and of course with  two new recipes for you! 

This recipe has 3 key ingredients - Chia seeds, yogurt and honey, the rest is up to you guys :) 

I LOVE to incorporate chia seeds into most recipes I do, purely because they contain so much goodness, 30g of chia seeds contains 11g of fibre, 12g of carbs and 4 grams of protein, plus all the omega 3 essential fatty acids and antioxidants!

So, the recipes that I am going to write for you today are super simple and literally take about 20-30 minutes to prepare and make! I made a lemon and honey pudding and a mixed berry one too!

WHAT YOU NEED 

1 Lemon 
1 Pot of Fage UK 0% Yogurt 
1 Tablespoon of Honey
6 Tablespoons of Chia Seeds 

The only thing you need to do differently for the mixed berry pudding is to swap the lemon for mixed berries! (Told you they were simple!)


METHOD 

1. Grab a mixing bowl and put half the tub of Fage UK yogurt in (you can use any yogurt you want I just prefer this one), and the chia seeds and stir well until they are both combined. 
2. Cut the lemon in half and juice it, then pour the juice into the mixture and stir (again), then add the honey, and you guessed it, stir it well again! 
3. Grate some lemon zest into the mixture, stir it up and pour the mixture into two small jars like the ones pictured. 

(I definitely just wrote those numbers whilst having Dua Lipa's new rules in my head) Buuuut I'm gonna have to add a 4th step so Dua Lipa, add a 4th rule? LOL. 

4. Put the jars in the fridge overnight, this should give the mixture time to set, and when you eat it it's like a mousse-like consistency! 


The only difference for the mixed berry ones would be to blend the blueberries and strawberries before you add them to the mixture, then just make sure you combine everything well before pouring the mixture in the jars and putting them in the fridge to set!
And there you have it! Delicious chia seed puddings to have at literally anytime of day, I personally like to have them for breakfast as they are filling yet quite light! Perfect if you're on the go too. 

Let me know what you think in the comments below xo

OH and before I go, can we just appreciate how amazing this tank top is from HeyHolla! Fit Wear for an allstar cheerleader that absolutely loves chia?! I just HAD to buy it when I attended Be:Fit London 


Caio for now guys xo 

Lemon Honey and Chia Seed oat muffins

Lemon drizzle has got to be up there in my top 5 cakes, but obviously not something I can eat until my hearts content (unfortunately). 

So I thought I'd give a healthy version a go! Although, if you're expecting a sugary, lemony, indulgent piece of cake you're in the wrong place. These muffins have different ingredients to a Lemon Drizzle cake, so it's bound to taste slightly different! 


I tested out a few recipes last night, I will post the successful ones on here in the following weeks!

What you'll need for the Lemon Honey and Chia Seed muffins - 
  • 35g of old fashioned oats
  • 30g of powdered oats
  • 1/2 a teaspoon of baking powder 
  • 2 tablespoons of brown sugar
  • 1 banana 
  • 2 table spoons of greek yogurt 
  • 1 teaspoon of vanilla extract 
  • 1 egg 
  • 2 table spoons of honey
  • the juice and zest of 1 lemon 
  • 2 tablespoons of chia seeds 
  • Pinch of salt 

The Method - 
First off, you'll need to preheat your oven to 180 degrees (my oven is fan assisted so you may need to slightly increase the temperature if your's isn't. 

Put 8 cake cases into a tin ready to fill with the mixture! 

You'll then need to peel the banana and mash it in a bowl with a fork until it's all gooey. Then cream together the banana, Greek yogurt, honey, vanilla extract and brown sugar until it's combined completely. Then add the egg and beat it in. (I'm fully aware that this will look like something that has seen better days at this stage haha!)

Add the salt, baking soda and the powdered oats, then stir until it's all mixed together well.

Squeeze the life out of the lemon into the mixture, without getting any pips in it! Then grate some of the lemon zest in too.

The penultimate stage before you can taste the goodness, is to add the old fashioned oats and chia seeds to the mixture, and stir. 

Take a large tablespoon of the mixture and place into each of the cake cases, this should make roughly about 8 muffins. 

Pop in the oven for 15-20 minutes (or until golden brown). And there you have it! Some healthy Lemon Honey and Chia seed muffins! 


The nutritional values of each muffin is as follows (approx)- 

Kcal - 92 
Fat - 2.25g 
Protein - 2.5g 
Carbs - 15.25g 

They are perfect for a mid afternoon snack with a cuppa or even for breakfast! I had 2 today for breakfast with my morning Womens Best Vanilla Protein Shake :)

Let me know what you think of the recipe in the comments and if you try it! 

Ciao for now xo

Follow me on BlogLovin'


Reese Peanut Butter Cups - MOVE OVER

Hallelujah, praising the gods and thanking them for making my adult taste buds like dark chocolate! Why? Because my take on the classic - Reese Peanut Butter cups, is a dream!


All you need to make them is 2 ingredients, thats it! 

  • 2 Lindt 85% dark chocolate (you can use 70% if preferred as 85% can be quite bitter to some people)
  • A jar of Meridan Peanut Butter 

Why dark chocolate? 

Dark chocolate is packed full of fibre and antioxidants and the darker the chocolate, so the higher the percentage the less sugar the chocolate contains. However, it's definitely not to everyone's taste, if you tried to give me a piece of dark chocolate a year ago I would've told you I'd rather eat frogspawn. But as I'm 24 now there had to be a perk somewhere and that was me starting to LOVE dark chocolate. (thank god getting old has perks ey) 


The Method 

Making these peanut butter cups is so so simple. First off, take one bar of the Lindt chocolate and break it up into little pieces and put them in a bowl ready to melt. I like to melt my chocolate in the microwave, blast it for 30 seconds, take it out and stir, then repeat until the chocolate is fully melted. This ensures that you're not burning the chocolate (and you get to lick the spoon - winner!!) 

Once the chocolate is melted, take your cake cases and put them on a plate, pour about 5mm-1cm of the melted chocolate into each case to just cover the bottom, you should get about 10 out of the 1 bar of chocolate. Then pop them in the freezer to chill (insert funny chilling in the fridge meme here) for about 10 minutes or so. 


After 10 minutes in the freezer the chocolate should be set again. It's Peanut Butter Jelly Time! (Minus the jelly). Put a teaspoon of Meridian Peanut Butter on each of the cases. You can use any kind of peanut butter, but I like Meridian because it's organic and has no nasties, so it's much better for you than most. 


Take the other bar of Lindt chocolate you have and melt it the same way you done the first bar. Then pour the melted chocolate over the peanut butter until it's completely covered. Once you've covered them all, pop them in the freezer for another 10 minutes or so. 

Once set, sit back, relax, grab a cuppa and tuck in! 

BUT, just because these are a healthier version of Reese's Peanut Butter cups it is still chocolate, so don't say I didn't tell you that eating all 10 is probably not the best idea! (but if you fancy a treat, go for it ;) )

I hope you liked this recipe! let me know what you think in the comments. 

Ciao for now xo